1 / 10
First step is to log on or register. When registering, the most important thing is to enter the dates you are visiting. You can change these details any time from the "My Details" screen.

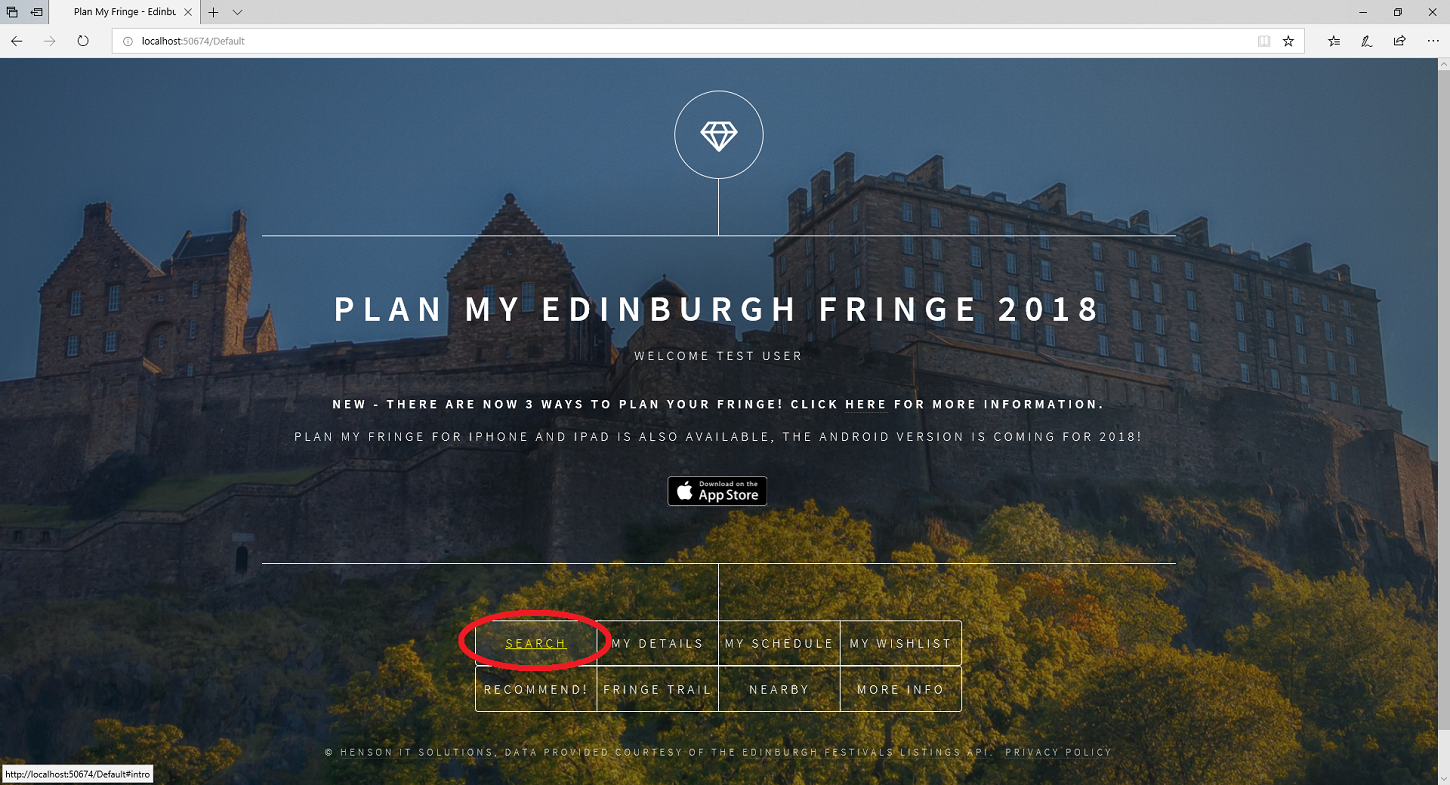
2 / 10
Click the Search Option to Search For or Browse Categories for Shows
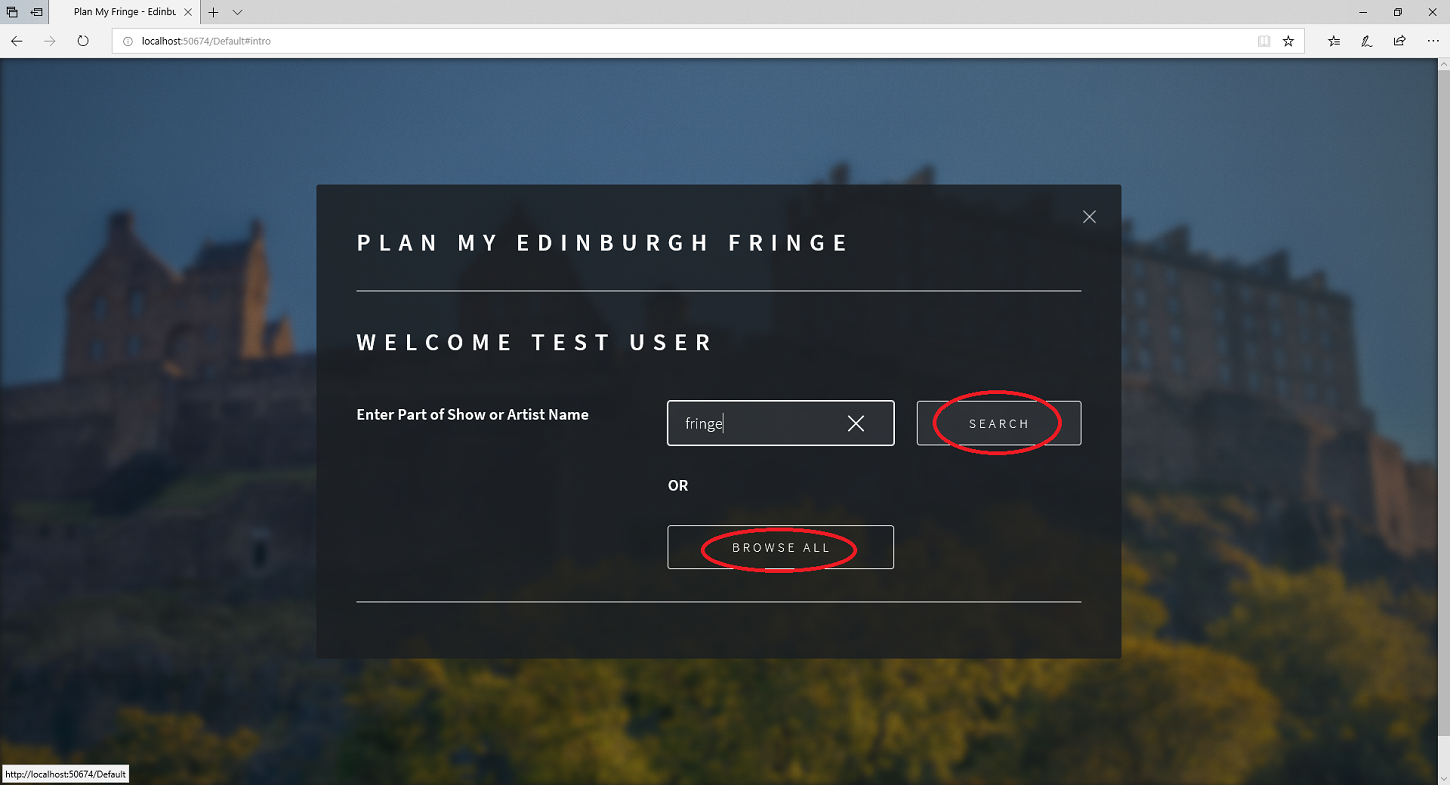
3 / 10
You can use the Search option to search for shows you have seen in the brochure, or that you have been handed flyers for, that you would like to see.
You can also browse for shows by category and by start letter.
4 / 10
The search results will appear. Click on the Title of the show to view it in more detail.

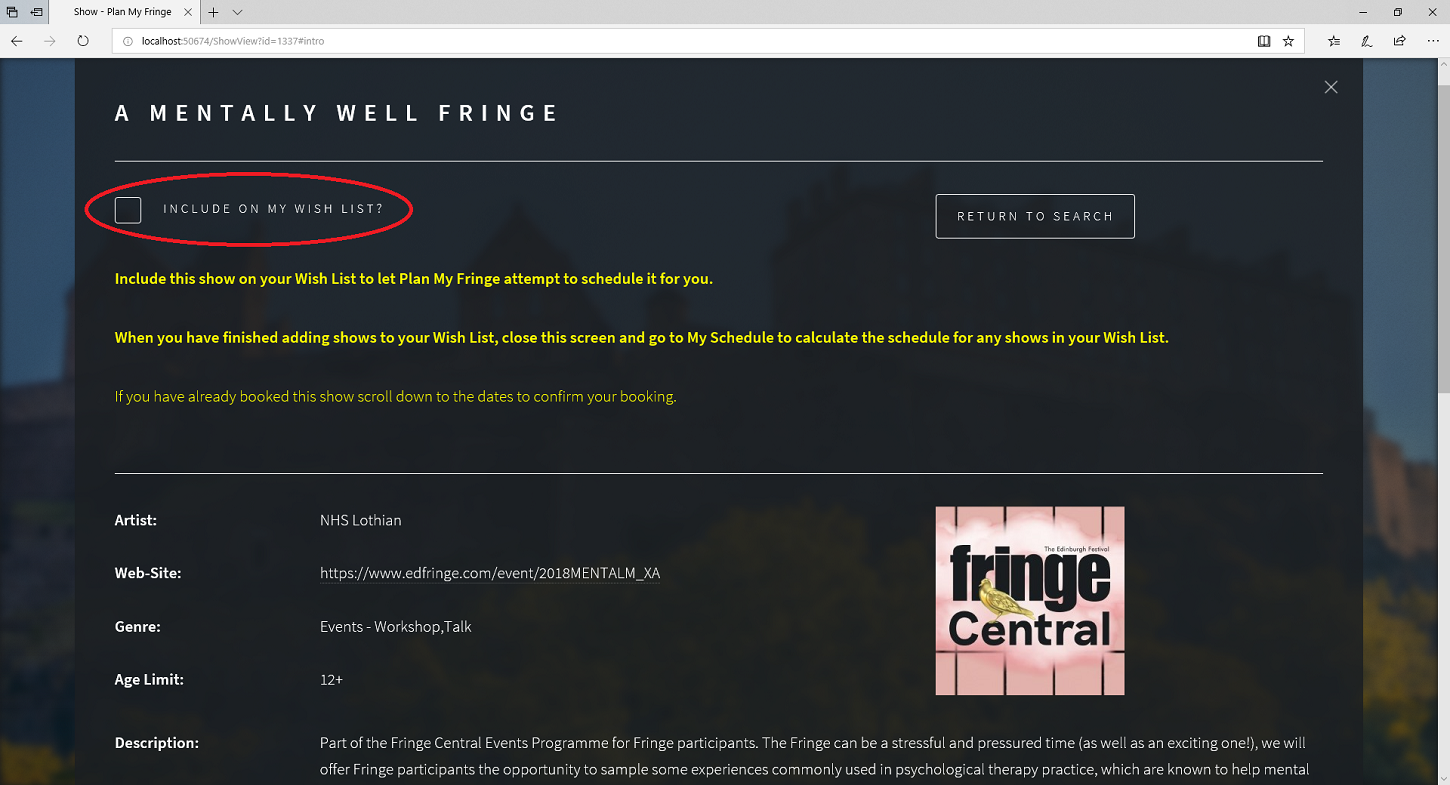
5 / 10
If you want to add the show to your WishList, tick the "Include on WishList" tick-box.
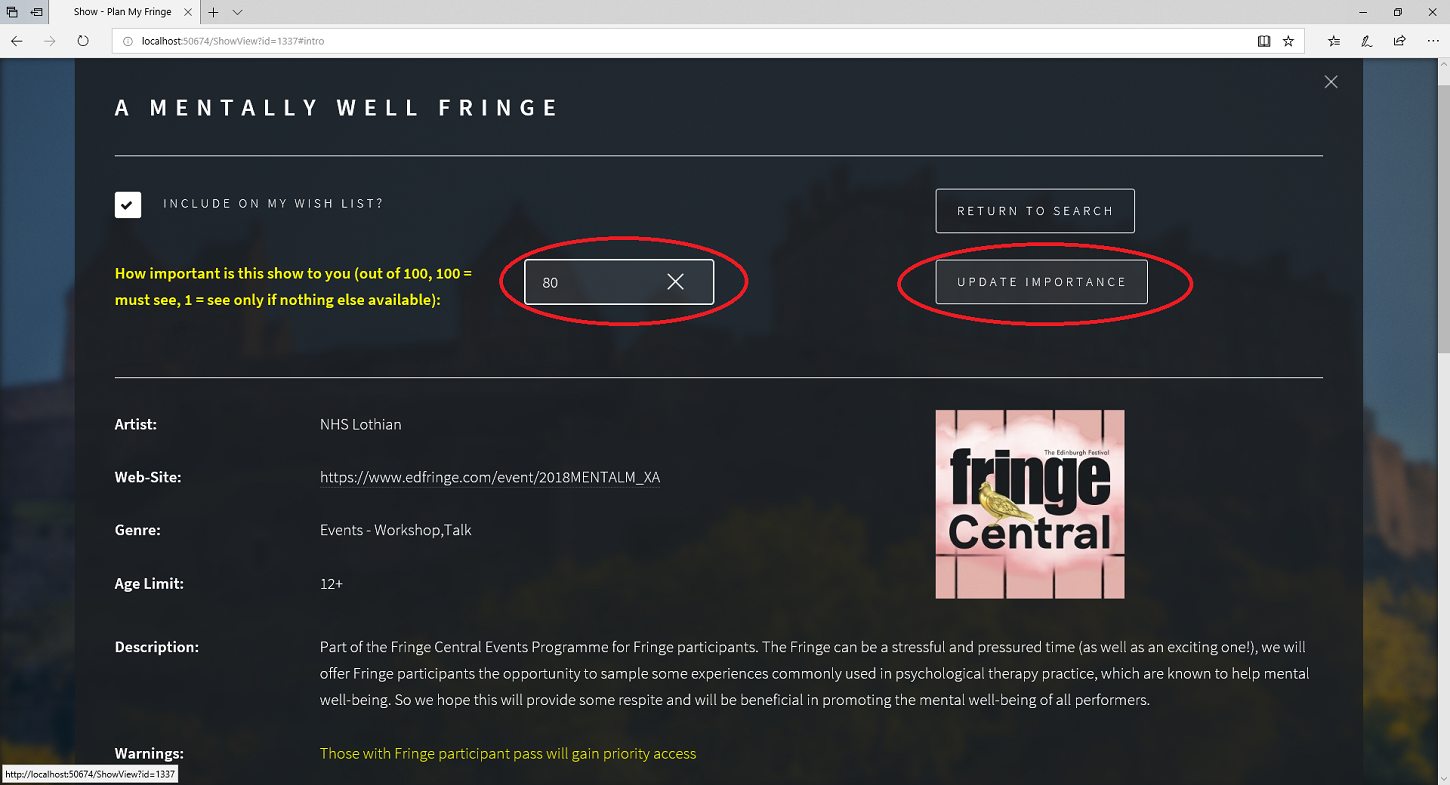
6 / 10
A box appears, asking you how important the show is to you (100 = must see, 1 = see only if nothing else available).

7 / 10
The importance box is optional, but shows with a higher rating are prioritised for your viewing when you Calculate ahead of lower rated and un-rated shows.
8 / 10
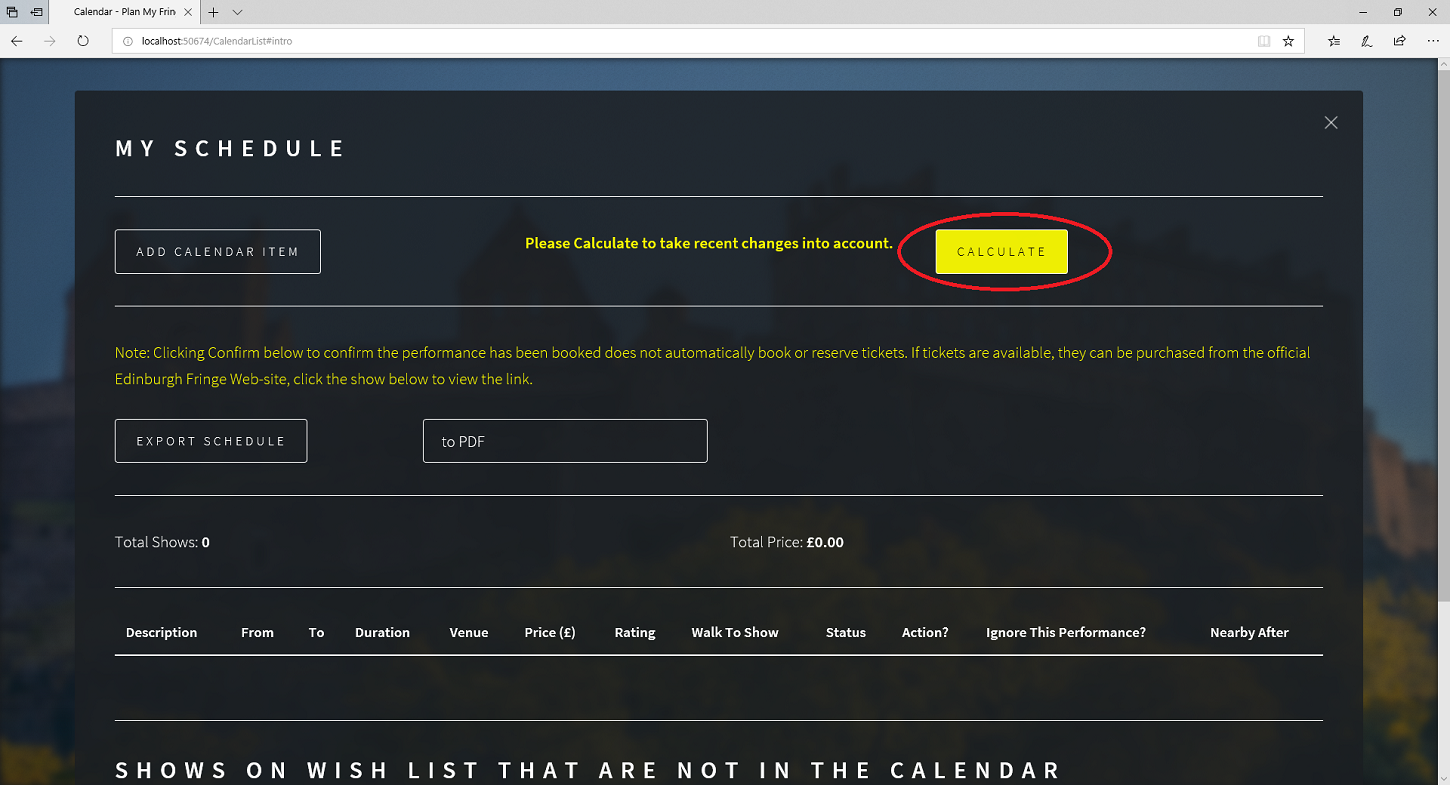
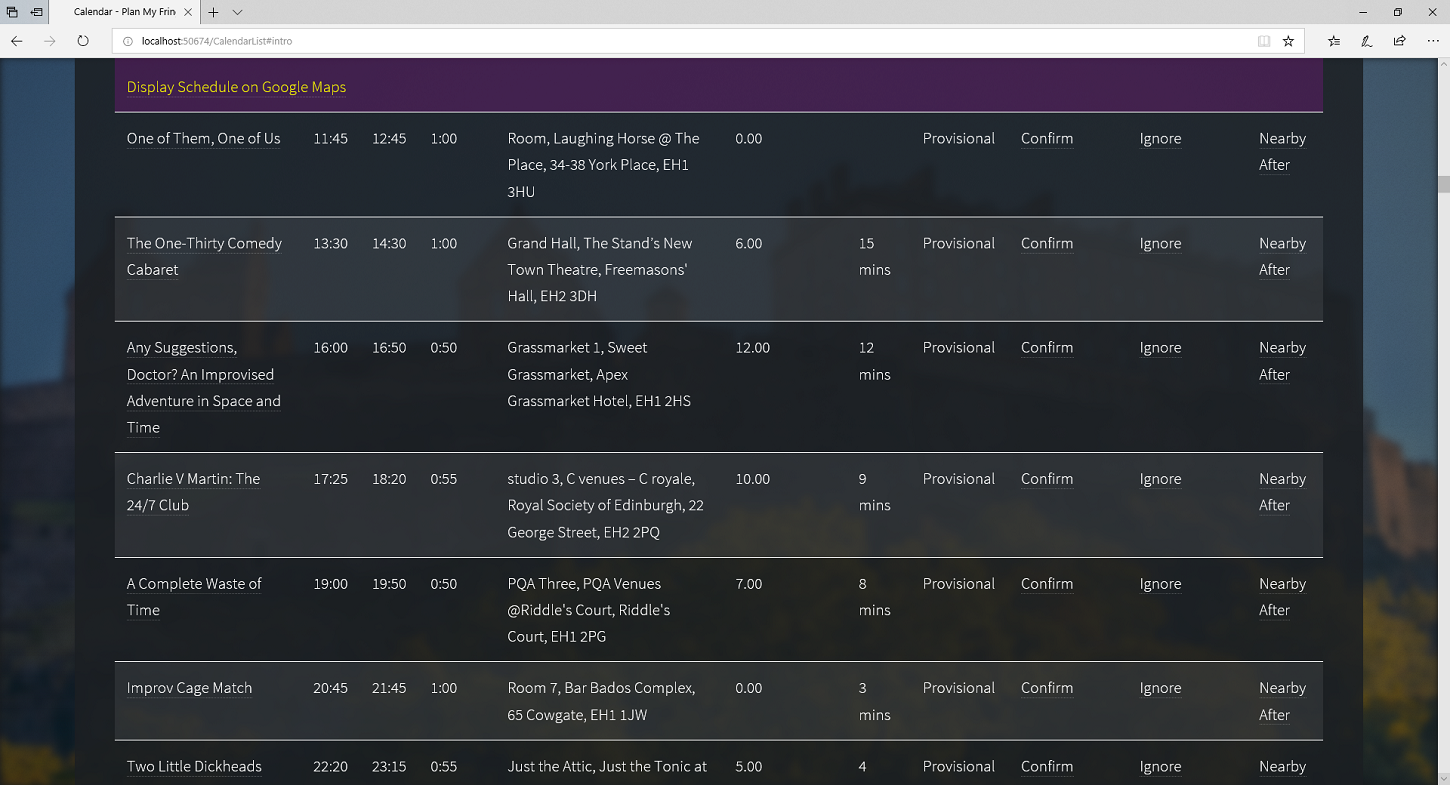
Repeat for as many shows as you wish. Once all the shows you want to appear are on your WishList, you can go to "My Schedule" screen and click "Calculate" to ask Plan My Fringe to slot in as many shows as possible.
Any shows on your WishList that you have given a rating to will be scheduled ahead of any shows added through the Recommendations screen.
9 / 10
Your schedule is now complete. But you can still revise it any time before or during your Fringe Visit by adding shows to your WishList or searching for more Recommendations.
You can also add manual items to your calendar. If you buy tickets to a show, you can confirm it, which means it won't be moved when you next Re-Calculate.
10 / 10
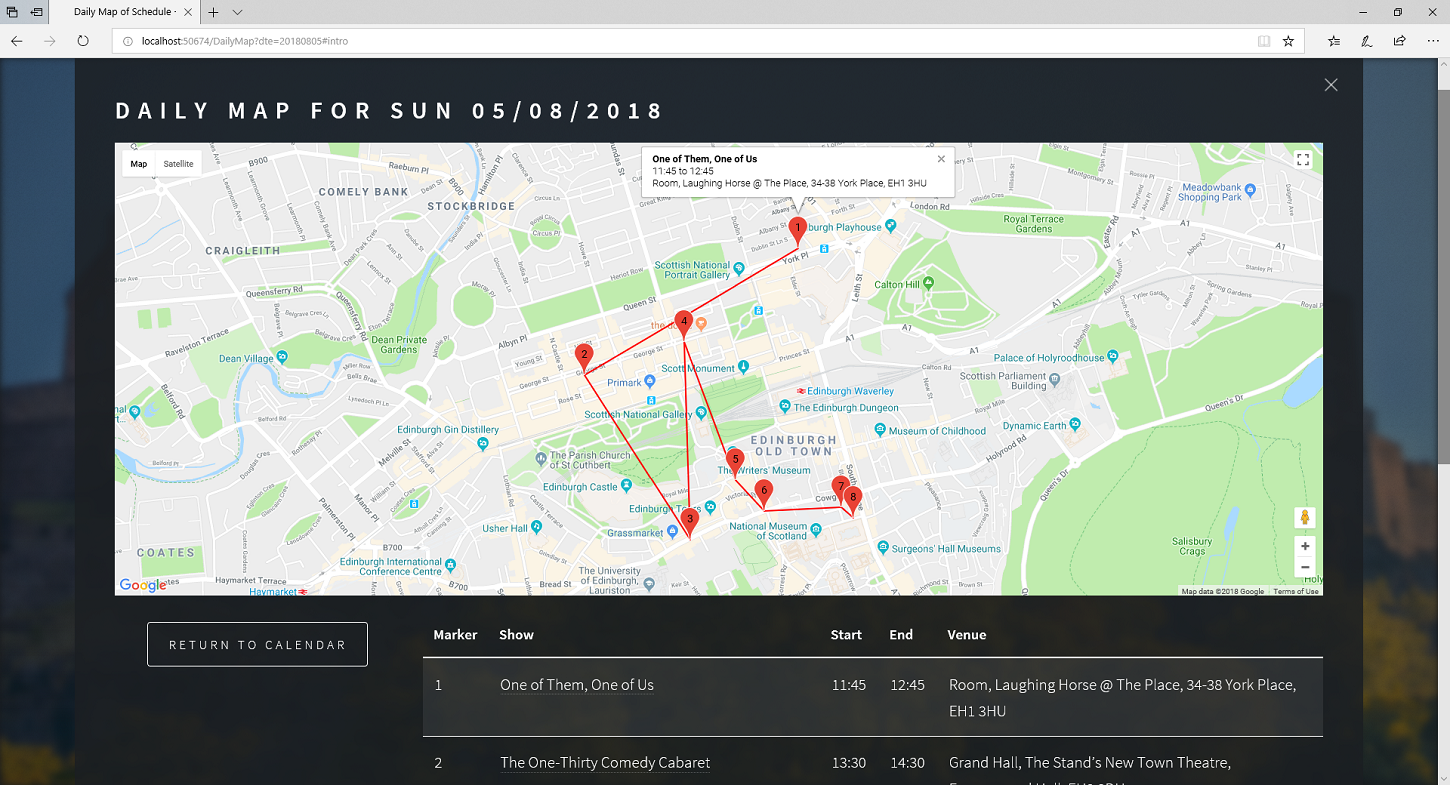
You can also view a mapping display for any day, or export it to a PDF, spreadsheet or CSV version.
Or simply use the mobile app to view your schedule while you are out and about at the Fringe!
❮
❯